RGB LED Color gamut

arduino, computer art, processing, projects

No Comments


Share this post


For the Carlson Garcia project, we were wondering about the possibilities of expanding the color vocabulary of the given 8 primary colors (RGB + complementaries) through PWM and code. Initially, we noticed that the screen values did not match the actual colors of the LED strips. It was a frustrating task to design sculptures that would display the actual colors that we envisioned. For this reason, we designed a processing application that would allow us to see how the screen colors were represented in the LED displays.
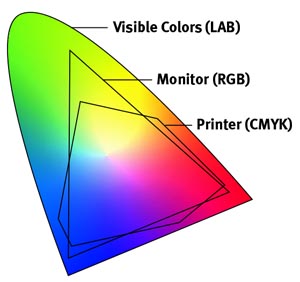
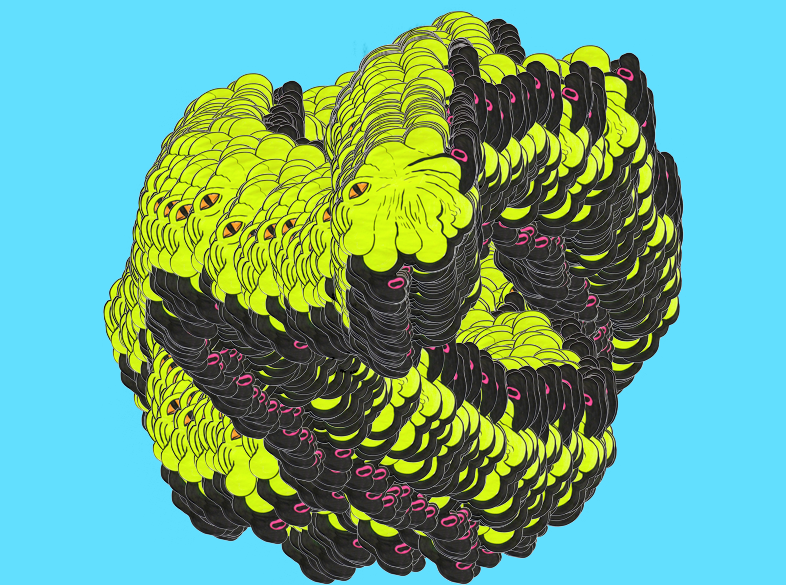
gamutsWe discovered that through PWM we could emulate a wide gamut of colors bigger than the given 8 primaries. However, the LEDs do not provide all the actual 255 values for each color. With the software and hardware like seen in the video, we are able to see how the colors will be shown in the LED hardware. This development has been very helpful to design sculptures with specific color palettes that we design. The color spectrum is not as wide as the 17 million colors of a screen, but at least we get to combine a wider number of colors. It is hard to know right now how many colors can be represented, but at least we have thousands of colors to chose from.

The code for our app is below (Processing with arduino firmata):
/* PALETTE for Processing 2.1.2 (2015)
Use Arduino Firmata to control ports. Cnange the index number [?] corresponding to your USB port
This program works with the hardware "palette" created by Carlson Garcia
www.carlsongarcia.com
Use nobs to mix RGB values of the LEDS. Record the liked colors by making screenshots
of the combinations */

import processing.serial.*;
import cc.arduino.*;

Arduino arduino;

int red1=3;
int green1 =5;
int blue1=6;
int red2=9;
int green2 =10;
int blue2=11;

int mapvalred1,mapvalred2;
int mapvalgreen1,mapvalgreen2;
int mapvalblue1,mapvalblue2;

boolean andruinoThere = true; //Deactivate andruidno for debuggings

void setup() {
size(800, 600);
println(Arduino.list());
arduino = new Arduino(this, Arduino.list()[12], 57600); // 3 or 12

}

void draw() {
background(0);
fill(mapvalred1,mapvalgreen1,mapvalblue1);
rect(0,0,width/2,height/2); //Left Rectangle
fill(mapvalred2,mapvalgreen2,mapvalblue2);
rect(width/2,0,width/2,height/2); //right rectangle
//rect(width/2,height/2,width/2,height/2);
//rect(0,height/2,width/2,height/2);

// read analog input arduino.analogRead(0) from potentiometer, store it in a variable, map it
// and write it arduino.analogWrite(9, mappedto255);
int valred1=arduino.analogRead(0);
int valgreen1=arduino.analogRead(1);
int valblue1=arduino.analogRead(2);
int valred2=arduino.analogRead(3);
int valgreen2=arduino.analogRead(4);
int valblue2=arduino.analogRead(5);

mapvalred1=int(map (valred1, 0,1023,0,255));
mapvalgreen1=int(map (valgreen1, 0,1023,0,255));
mapvalblue1=int(map (valblue1, 0,1023,0,255));
mapvalred2=int(map (valred2, 0,1023,0,255));
mapvalgreen2=int(map (valgreen2, 0,1023,0,255));
mapvalblue2=int(map (valblue2, 0,1023,0,255));

arduino.analogWrite(red1,mapvalred1);
arduino.analogWrite(green1,mapvalgreen1);
arduino.analogWrite(blue1,mapvalblue1);
arduino.analogWrite(red2,mapvalred2);
arduino.analogWrite(green2,mapvalgreen2);
arduino.analogWrite(blue2,mapvalblue2);

fill(255);
text(mapvalred1,width/4,400);
text(mapvalgreen1,width/4,420);
text(mapvalblue1,width/4,440);

text(mapvalred2,500,400);
text(mapvalgreen2,500,420);
text(mapvalblue2,500,440);
}

Read more

ISEA 2013

arduino, news, presentations, processing, projects, thoughts, visualization, wiring, workshop

No Comments


Share this post

Screen Shot 2013-06-09 at 11.52.44 AM

I arrived to Sydney a few days ago for the ISEA. Before the conference starts on Tuesday, the event has a series of workshops with an electronic arts focus. I gave my workshop “Sensing for Visualization” yesterday  and will repeat it today at 3 PM. The idea was to create a programming crash-course for physical computing. The workshop covered Processing and the Wiring board. It was cool to put the idea to a test with participants. The workshops occur at the College of Fine Arts of UNSW.

You can download the file with the workshop here

I was interested on teaching the Wiring board in the context of the Latin American Forum of the ISEA and to give information about this seminal project that preceded Arduino developed by the Colombian artist/designer Hernando Barragán. Hernando was a professor while I did my art undergrad in Bogotá at Universidad de los Andes, were he still teaches.

There are a lot cool things going on. Right now I at a workshop named SurSouth, an online collaborative conversation. It was great to reconnect with an old friend, Hamilton who now lives in London. His work is pretty cool. His objects are living organisms that exist through alchemy and technology. Check his stuff here

There we be a lot coming up. I’ll try to document other experiences of this trip. There is too much going on.

Read more

Interactive light show

arduino, performance, processing, projects

No Comments


Share this post

Screen Shot 2013-05-04 at 8.39.16 AM


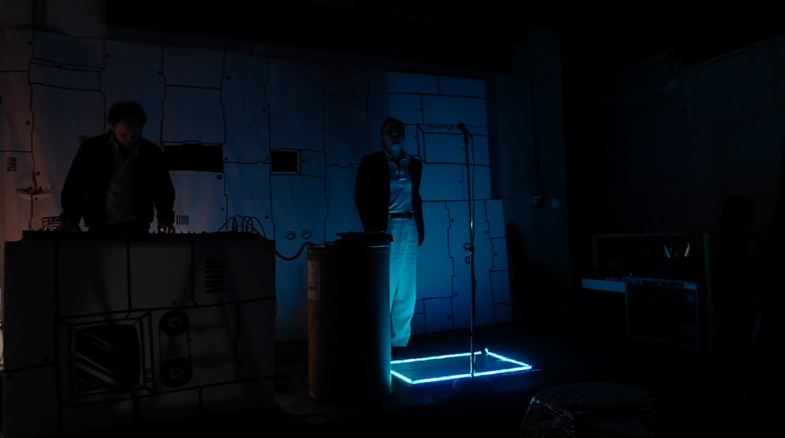
I have been involved with the band Tigerfox since their very beginnings as a sort of an art director for their live performances. Last year I did some video projections of computer programs with interactive graphics. For the their new music, my friend Ryan Puetz had this grandiose vision of adding lights to their show. I was excited to create some kind of “interactive light carpet” that I could control in the background, changing colors and rhythmic patterns. I used arduino and processing to make this. If you want to see a video of the performance/music, check here

Read more

Arka-android

processing, projects

No Comments


Share this post

Ever since I went to the processing.android symposium led by Daniel Sauter at UIC,  I wanted to have an android. It is fairly easy to develop applications for android mobiles using the language processing. You can find very complete documentation on the how-to’s here: http://wiki.processing.org/w/Android. You can also have access to the hardware components of the android device using the Ketai library, developed by Sauter and Jesus Duran.

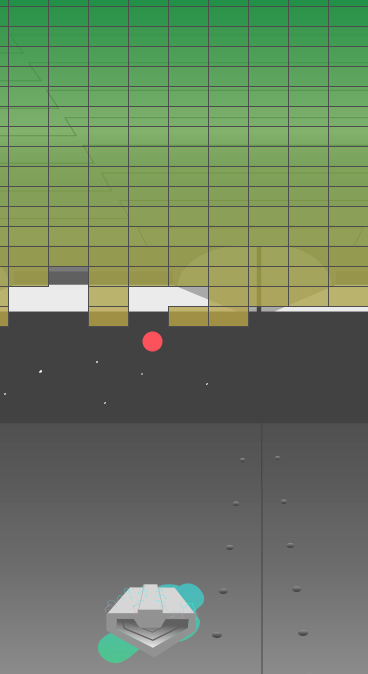
I incorporated my paintings as sprites for the popular game “Arkanoid.” My idea was to make a painting into something more than painting. A playable painting?

Read more

Networked Objects

arduino, processing, workshop

No Comments


Share this post


Last January, I invited Camilo Martinez and Gabriel visited to visit the Lafayette area to develop an art workshop and residency with Purdue students and the lafayette community. It was a great experience to have this artists lead an arduino-based workshop aimed for the Physical Computing students from Purdue’s electronic and time based media artists.

During the workshop, Gabriel and Camilo taught us how to interface home appliances to email and twitter. The results were displayed in a one day exhibit at foamcity.

Screen shot 2013-03-19 at 1.14.38 PM

Read more

Arkanoid clone

processing

No Comments


Share this post

This is the code for an arkanoid clone based on local-guru‘s. I decided to use it to explain how to bring vector graphics from illustrator into a game framework in processing using the Pshape object. I have commented as much as possible the original code to allow for an easy implementation.


/**
* a arkanoid clone by
http://www.local-guru.net
* use the mouse to play

slightly modyfied by snebtor.org
Replacing graphic elements with pshape
*/

int px, py;
int vx, vy;
PShape ship;
PImage back;

boolean paused = true;
boolean done = true;
int[][] stones;

void setup() {
//noCursor();
size(1280,720);
ship = loadShape("ship3.svg");// vector loader
back=loadImage("bg.png");//raster loader
smooth();
px = width/2; //position of ball x
py = height-70;//initial position of ball y

vx = int(random( -25, 25 ));//initial speed
vy = -40;

stones = new int[31][17]; //two dimesnional array of stones
for( int x = 0; x < 31; x++) { for( int y = 0; y < 17; y++ ) { stones[x][y] = y + 1; } } textFont( loadFont( "font.vlw" )); } void draw() { //shape(bg,0,0);// needs to be a simple image in this case we rasterize background(back); stroke(60); strokeWeight(1); noCursor(); // update postion of the ball if (!paused) update(); // draw all stones that are not removed yet // check if all are gone done = true; for( int x = 0; x < 31; x++) { for( int y = 0; y < 17; y++ ) { //create new rows or columns of elements if ( stones[x][y] > 0 ) {
done = false;
fill( 1 + 10 * stones[x][y],145,52,200 );//this is an array for the gradient fill
rect( 10 + x * 40, 10 + y * 20, 40, 20 ); //this is the stone design
}
}
}

// no stone remaining - display yippie message
if ( done ) {
paused = true;
fill(255);
textSize( 48 );
text( "JIPPIE!", 50, 200 );
}

// display text if paused
if ( paused ) {
textSize( 16 );
fill(128);
text( "press mousebutton to continue", 10, 650 );
}

//draw starts here

// draw paddle
shape( ship, mouseX+106, height-280, ship.width/3, ship.height/3 ); // here we locate the new vector file considering width of graphic

fill(mouseX,56,70);
noStroke();
// draw ball
ellipse(px,py,20,20);
}

void update() {
// check if ball dropped out of the lower border
if ( py + vy > height - 10 ) {
px = width/2;
py = height-70; // make the distances relative to size of the screen
vx = int(random( -40, 40 )); //change speed here too
vy = -19;
paused = true;
}

// check if the ball hits a block
for( int x = 0; x < 31; x++) { for( int y = 0; y < 17; y++ ) { if ( stones[x][y] > 0 ) {
if ( px + vx + 10 > 10 + x * 40 && px + vx - 10 < 10 + x * 40 + 40 && py + vy + 10 > 10 + y * 20 && py + vy - 10 < 10 + y * 20 + 20 ) { stones[x][y] = 0; // change the velocity in y direction if the block has been hit // on the bottom or on the top if ( px + 10 > 10 + x * 40 && px - 10 < 10 + x * 40 + 40 ) vy = -vy; // change the velocity in the x direction if the block has been hit on the side if ( py + 10 > 10 + y * 20 && py - 10 < 10 + y * 20 + 20 ) vx = -vx; } } } } // change the direction if the ball hits a wall if (px + vx < 10 || px + vx > width - 10) {
vx = -vx;
}

if (py + vy < 10 || py + vy > height - 10) {
vy = -vy;
}

// check if the paddle was hit
// change the place where you want the ball to be matched with mouseX
// take into consideration the height of your vector file
if ( py + vy >= height-80 && px >= mouseX - 53 && px <= mouseX +53 ) { //change these values to map boundaries of ship, need to know size of ship vy = -vy; vx = int(map( px - mouseX, -33, 33, -18, 18 )); } // calculate new postion px += vx; py += vy; } void mousePressed() { paused = !paused; if (done) { for( int x = 0; x < 31; x++) { for( int y = 0; y < 17; y++ ) { stones[x][y] = y + 1; } } done = false; px = width/2; py = height/2; vx = int(random( -40, 40 )); vy = -18; } }

Read more

A&D 101 – Electronic Media Studio

arduino, courses, processing

No Comments


Share this post


The Electronic Media Studio 1 is an art studio before it is a computer course. Our goal is to make art with computers, not simply learn how to use computers. Every student in this course should use it as an opportunity to become a media art creator rather than consumer. Assignments in this course are invitations to invent and experiment. They are also designed as hands-on experiences to explore the possibilities and pitfalls of this new medium.

Read more

Experiencia Mistica in Lafayettech

arduino, processing, workshop

No Comments


Share this post

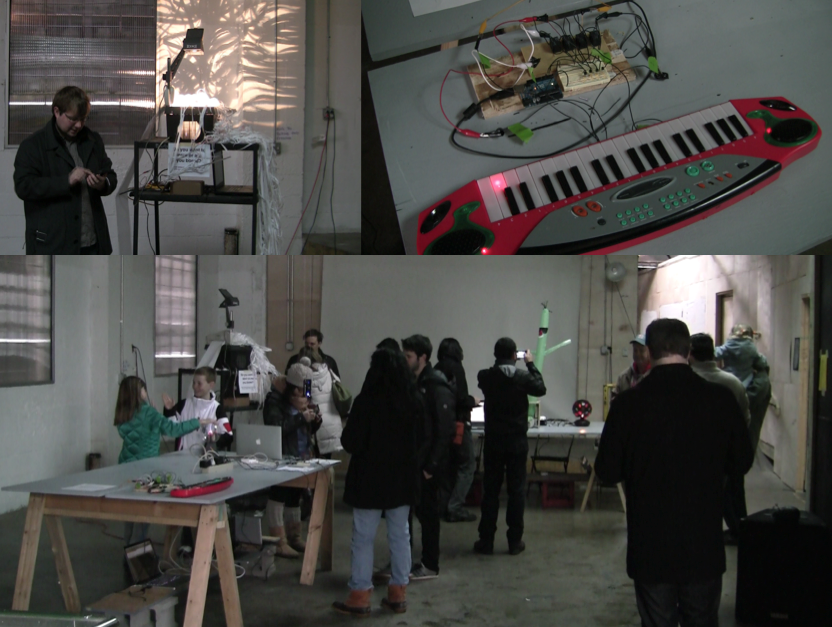
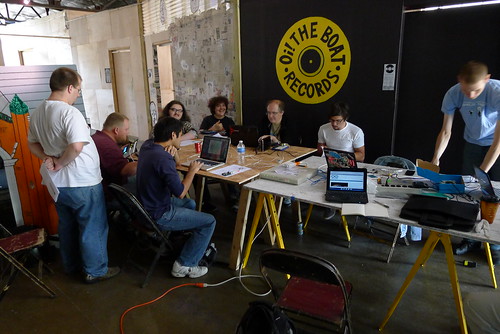
Last month, I met Nelu Lazar from an organization called Lafayettech. Nelu and  his group have been organizing lots of community events in technology development and entrepreneurship. I was invited to do an Arduino workshop that was hosted in foamcity on June 3. It was really fun to find so many people interested in developments with arduino. In fact, I was the least knowledgeable person in arduino within the group. There were people of varied disciplines and ages, with a common interest. During the workshop, we were able to hack an accelerometer, a LED panel and some RGB lights. Here is a pic from that day.
Arduino Hack day

Also Nelu made the really cool video/interview about my project. (above)

Read more

Experiencia Mistica program

arduino, processing, projects, tutorial

No Comments


Share this post

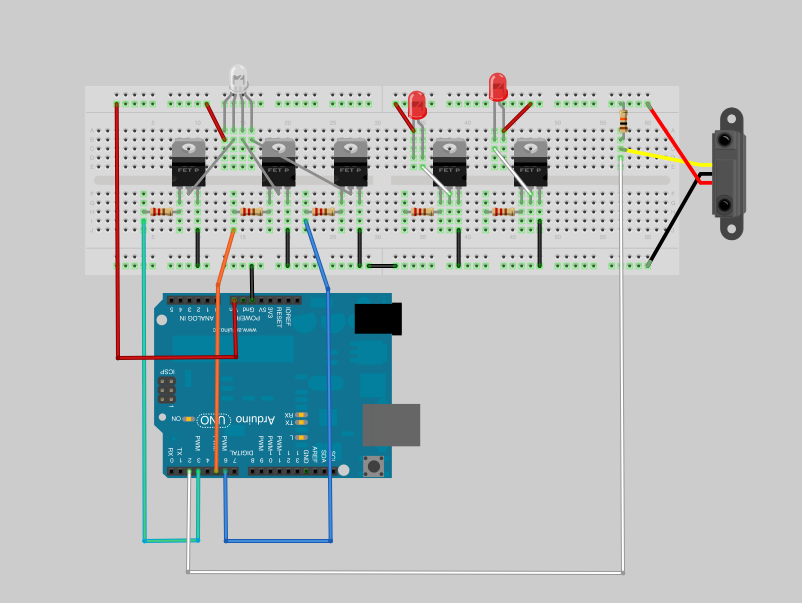
In an effort to document and archive the circuit and program of the experiencia mistica installation, I publish this circuit and code, in wich a PIR (infrared motion sensor) triggers a display of a RGB LED strip and 2 strobe lights. Additionally has a 12V input and a webcam. It runs in processing with different libraries, such as Arduino, processing.video and minim for the audio


import processing.serial.*;
import cc.arduino.*;
import ddf.minim.*;
import processing.video.*;
import gifAnimation.*;
Minim minim;
AudioPlayer player;
Arduino arduino; //creates arduino object
Capture cam;
Gif tunel;

//variables for PIR
int PIRPIN = 2;
int ledPin = 13;
int counter;

//Variables for RGB strip
int REDPIN= 5;
int GREENPIN= 3;
int BLUEPIN= 6;
int r, g, b;

//Variables for R L strobes
int LEFTPIN =9;
int RIGHTPIN=10;

float leftChannel;
float rightChannel;
float soundValLeft;
float soundValRight;

void setup(){
size(800, 600);
colorMode(HSB);
tunel = new Gif(this, "tunel.gif");
tunel.loop();
cam = new Capture(this, 160, 120);
arduino = new Arduino(this, Arduino.list()[0], 57600);
arduino.pinMode(PIRPIN, Arduino.INPUT);
arduino.pinMode(ledPin, Arduino.OUTPUT);
arduino.pinMode(REDPIN, Arduino.OUTPUT);
arduino.pinMode(GREENPIN, Arduino.OUTPUT);
arduino.pinMode(BLUEPIN, Arduino.OUTPUT);
arduino.pinMode(LEFTPIN, Arduino.OUTPUT);
arduino.pinMode(RIGHTPIN, Arduino.OUTPUT);

minim = new Minim(this);
player = minim.loadFile("mystica2.aiff", 1024); //or 2048
player.play();

}

void draw(){
int pirVal = arduino.digitalRead(PIRPIN);

if(pirVal == Arduino.LOW){ //was motion detected
counter ++;
if (counter == 5){ // the sensor has to be triggered at least 5 times to detect strong motion
arduino.digitalWrite(ledPin, Arduino.HIGH);// send the siignal
player.play();
background (255, 0, 0);
//delay(2000);
}

}

if(pirVal == Arduino.HIGH){ //was motion detected

counter=0;
arduino.digitalWrite(ledPin,Arduino.LOW );
background (0, 0, 0);

}

if ( !player.isPlaying() ){
player.rewind();

}
if ( player.isPlaying() ){
for(int i = 0; i < player.bufferSize() - 1; i++) {
soundValLeft= player.left.get(i)*150;
soundValRight= player.right.get(i)*100;

}

int soundintL = int(soundValLeft); // int version of sound value
int soundintR = int(soundValRight);

arduino.analogWrite(LEFTPIN,soundintL);
arduino.analogWrite(RIGHTPIN,soundintR);
cam.read();
image(tunel,0,0);
image(cam, 322, 236);

if (g==255){ // loop for green variation
g=0;}else g++;

tint (g, 255, 255);

if (r==200){ // loop for red variation
r=0;}else r++;

arduino.analogWrite(GREENPIN,g);

arduino.analogWrite(REDPIN,r);

arduino.analogWrite(BLUEPIN,soundintR);

}

}

Read more

Experiencia Mistica

arduino, processing, projects, thoughts, visualization

No Comments


Share this post


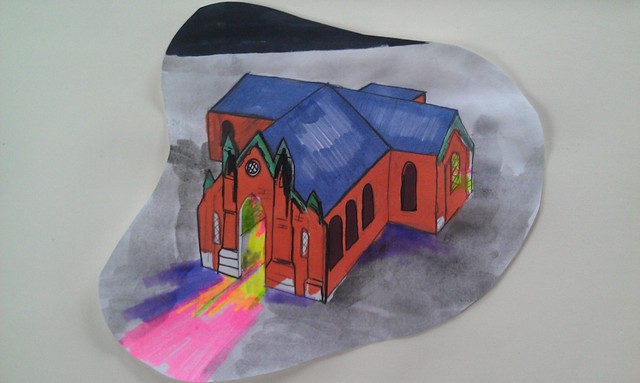
First sketch with the idea.

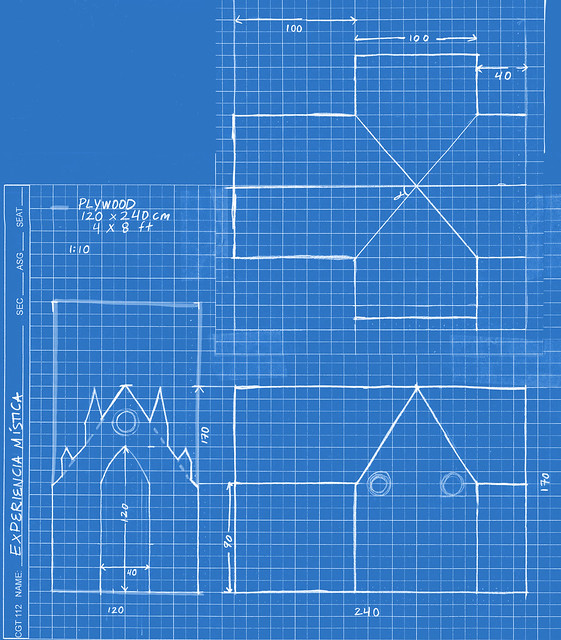
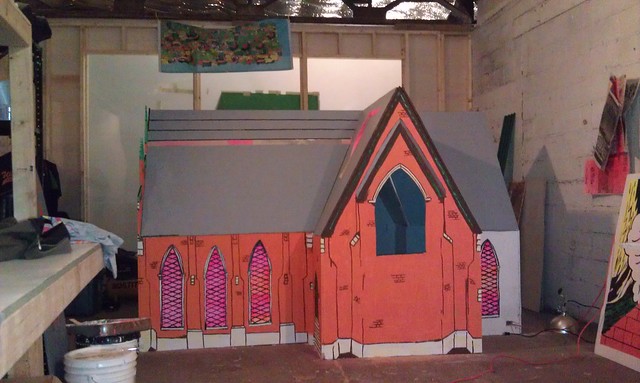
Okay, so I have embarked in a project that involves a lot of work, research and skill. A lot of people have seen me working at foamcity in a “church” or “castle”, but in reality is my Experiencia Mistica project. My motivation to do this project is an image that came to me a long time ago. This image is a three dimensional model of one of Lafayette’s churches. After that I started thinking about the most appropriate material to do a huge 3D model and after making 2 giant plywood structures in December, I went for plywood for this project. I have been obsessed with geometry for a while and during my PhD I’ve been exposed to visualization techniques and geometric modeling. I also teach a visualization class and Dr. Miller’s orthographic teachings came in very handy in the development of the model:

Max helped a ton with his knowledge and tools and we put together the main geometry in only 2 days! It was great. Now I am in the process of painting the outside and it’s been already a month of heavy work. This is how it looked last week:

Since then I have repainted a lot of the early lines because I was not happy with the way the geometry looked kind of flimsy. The video on top shows a program for controling the lights inside via arduino. There is so much to be done!

Read more

Read values from a 203CE accelerometer directly in Processing

arduino, processing, tutorial, visualization

No Comments


Share this post

1. Upload the “standardFirmata” example from the Arduino IDE in your Arduino board. If you are using Arduino UNO, there is a standard firmata for UNO.

2.Install Arduino library for processing in your libraries folder in the processing sketchbook

3.Test the following code for the Led blink to test that Arduino and processing are communicating correctly (code from the arduino playground page):

import processing.serial.*;
import cc.arduino.*;

Arduino arduino;
int ledPin = 13;

void setup()
{
//println(Arduino.list());
arduino = new Arduino(this, Arduino.list()[0], 57600);
arduino.pinMode(ledPin, Arduino.OUTPUT);
}

void draw()
{
arduino.digitalWrite(ledPin, Arduino.HIGH);
delay(1000);
arduino.digitalWrite(ledPin, Arduino.LOW);
delay(1000);      }

DEBUG.Try the analog read program in the arduino and use the serial monitor to see the maximum and minumum values of the accelerometer. You can take my word that they will be from 300 to 700. Supposedly should be (0-1023) in analog read with mid values around (500).

4. If the LED in the Arduino blinks it means that your “hello world” between the Arduino firmata and processing is working.

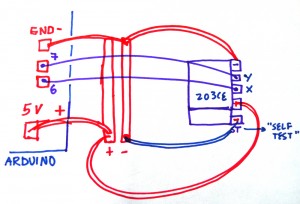
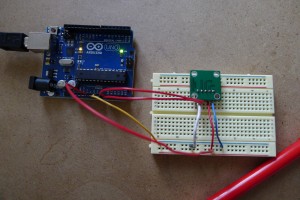
5.Build the circuit: (Connect to A0 for Y and A1 for X) in diagram it says 6 and 7, but it should be an analog pin.

This is the schematic in paper and the photo here:

6. Use the following code in processing:

import processing.serial.*;
import cc.arduino.*;
Arduino arduino; //creates arduino object
color back = color(64, 218, 255); //variables for the 2 colors
int xpin= 0;
int ypin= 1;
float value=0;
PImage a;
void setup() {
size(800, 600);
arduino = new Arduino(this, Arduino.list()[0], 57600); //sets up arduino
a = loadImage("mar.png");
arduino.pinMode(xpin, Arduino.INPUT);//setup pins to be input (A0 =0?)
arduino.pinMode(ypin, Arduino.INPUT);
}
void draw() {
background(back);
noStroke();
image(a,arduino.analogRead(xpin)-180, arduino.analogRead(ypin)-300); // in case you want to draw an image
//ellipse(arduino.analogRead(xpin)-130, arduino.analogRead(ypin)-130,30, 30); // in case you want an ellipse
}

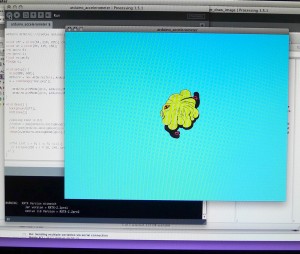
–This program tracks down the X and Y values from the accelerometer and displays them altering the position of a graphic in the screen.

–You’ll need to replace the image mar.png in the data folder.

–The position of the object needs to be calibrated to the min and max values the accelerometer is giving you through the serial monitor and for this reason I substract 180 and 330 to the position of the graphic. It still needs improvement!

Read more

Summer plans and trips

news, performance, processing, projects

No Comments


Share this post

I’ve been excited and even nervous about the upcoming events this summer starting in just a couple of weeks. Last Feb. I submitted the Revenge eternal documentation to a festival called LPM in Rome. Pretty soon we got informed about our acceptance in the new media festival for audiovisual performance.

Jordan and I will be traveling in two weeks to Rome and stay 5 days there for the duration of the event. We’re part of the “RE-Encode” selection for this year, curated by Andrea Sztojánovits. according to the page RE-Encode is:

Generative art is an expressive and increasingly explored genre, particularly thanks to the last decade’s technological novelties. The vj became a programmer and the programmer mutated into a performer, capable of creating incredible digital biospheres; a new era of sound and codes have produced novel organic visual experiences. From computer to physical and portable devices, many tools are available to creators and designers which contribute to the technological and artistic development through generative audiovisual language. Thanks to an active and reactive coding of the world surrounding us, the audience can perceive a unique atmosphere, experiencing complex performances of simple bits and binary codes.

I guess what we do fits into that category, since we use computer code to alter and produce audiovisual content.
Another exciting event is the one coming up in August. My paper entitled “Art and code: The aesthetic legacy of Aldo Giorgini” was selected for SIGGRAPH 2011 Vancouver. I am excited to present my research and a little bit scared about learning the required presenter/entertainer skills.
It has been a great semester so far and the fruits of my work are starting to bloom. After being rejected from a lot of applications to art residencies and bad luck with shows, I get to fulfill 2 of my dream goals for 2011. I have learnt a lot about growing up as an artist and realizing that the road is gonna be long and interesting. The accomplishment of goals is the beginning of new ones. As far as the PhD, I will be working in my research about Aldo Giorgini with great help of my Advisers, Dr. Whittinghill, Dr. Miller and Dr. Mohler. Additionally, The College of Technology will cover the costs of my research during the summer which is freakin’ awesome.
I would like to encourage other creative artists to persist on their quest to sustainability (economic-integrity-happiness) because it can happen to you. The way the art world works is pretty weird and the chances of becoming “a great artist” are pretty slim in our contemporary world. But, if you can be sustainable, then you’re an artist.

Read more

Audiovisual performance: revenge eternal

performance, processing, projects, thoughts

No Comments


Share this post

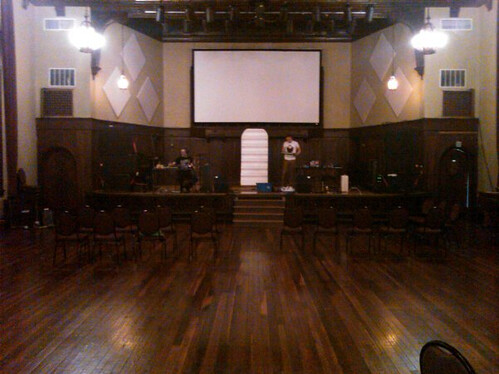
I just came back from Indianapolis. Last night we played in a place called “Earth House”, a venue for independent visual artists and performers. It is located downtown “Indy” a few blocks from our friends Jordan, Ryan and Benedict. It was a lot of fun. Unfortunately, one of the members of revenge eternal couldn’t come to our show and we had to adapt the sound material a little. Here is a picture of the auditorium where we played at:

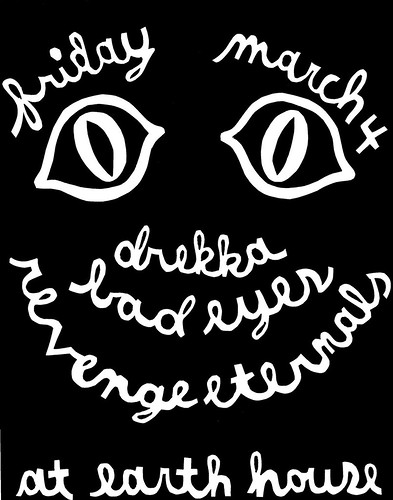
The show was booked by Erin Drew, a very interesting visual artist that I met a couple of years ago through a Meatballz show in Zonie’s closet, Indianapolis. Aaron and I got there and we were surprised that we were playing at a very old methodist? church. erin did a very cool flyer for the event too:

There was a big group of friends from the Lafayette infamous scene and their presence didn’t remain unnoticed by the public attending to the event.  The consumption of alcoholic beverages was frowned upon by one of the organizers of the event. Anyways, our show seemed to have a receptive audience and we also enjoyed the other bands on the show: Bad eyes and Drekka. I really hope we get to get around with the revenge eternal project. I just want to have something else than research. I am more of an artist than a researcher and I want to keep my interests well balanced. We will play 2 shows next friday in Lafayette, our hometown. we’ll see how that goes.

Here is a video documentation of the revenge eternal performance days before the earth house show:

Read more