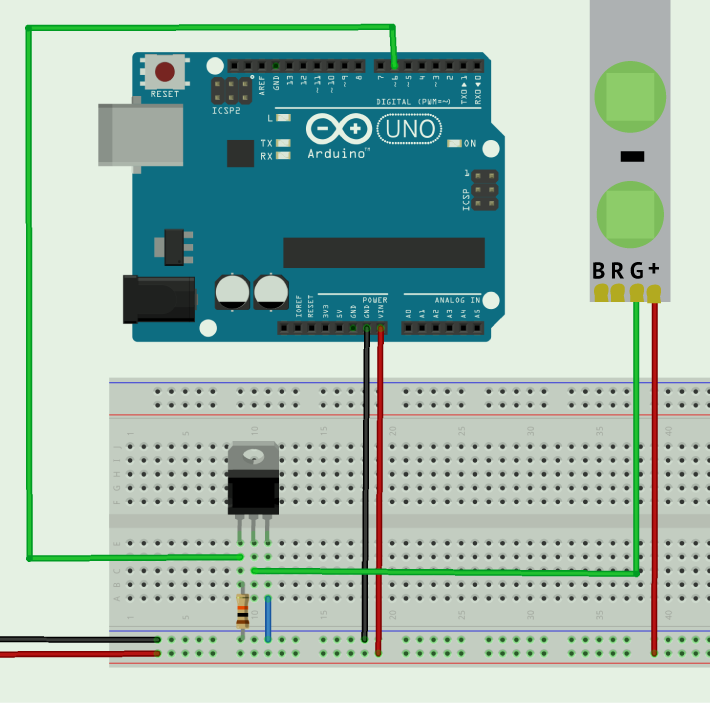
After a lot of errors and burnt boards, we redesigned our circuit. This one has been the most stable so far. It also keeps real cool 🙂
RGB LED Color gamut
For the Carlson Garcia project, we were wondering about the possibilities of expanding the color vocabulary of the given 8 primary colors (RGB + complementaries) through PWM and code. Initially, we noticed that the screen values did not match the actual colors of the LED strips. It was a frustrating task to design sculptures that would display the actual colors that we envisioned. For this reason, we designed a processing application that would allow us to see how the screen colors were represented in the LED displays.
 We discovered that through PWM we could emulate a wide gamut of colors bigger than the given 8 primaries. However, the LEDs do not provide all the actual 255 values for each color. With the software and hardware like seen in the video, we are able to see how the colors will be shown in the LED hardware. This development has been very helpful to design sculptures with specific color palettes that we design. The color spectrum is not as wide as the 17 million colors of a screen, but at least we get to combine a wider number of colors. It is hard to know right now how many colors can be represented, but at least we have thousands of colors to chose from.
The code for our app is below (Processing with arduino firmata):
/* PALETTE for Processing 2.1.2 (2015)

Use Arduino Firmata to control ports. Cnange the index number [?] corresponding to your USB port

This program works with the hardware "palette" created by Carlson Garcia

www.carlsongarcia.com

Use nobs to mix RGB values of the LEDS. Record the liked colors by making screenshots

of the combinations */
import processing.serial.*;
import cc.arduino.*;
Arduino arduino;
int red1=3;
int green1 =5;
int blue1=6;
int red2=9;
int green2 =10;
int blue2=11;
int mapvalred1,mapvalred2;
int mapvalgreen1,mapvalgreen2;
int mapvalblue1,mapvalblue2;
boolean andruinoThere = true; //Deactivate andruidno for debuggings
void setup() {
size(800, 600);
println(Arduino.list());
arduino = new Arduino(this, Arduino.list()[12], 57600); // 3 or 12
}
void draw() {
background(0);
fill(mapvalred1,mapvalgreen1,mapvalblue1);
rect(0,0,width/2,height/2); //Left Rectangle
fill(mapvalred2,mapvalgreen2,mapvalblue2);
rect(width/2,0,width/2,height/2); //right rectangle
//rect(width/2,height/2,width/2,height/2);
//rect(0,height/2,width/2,height/2);
// read analog input arduino.analogRead(0) from potentiometer, store it in a variable, map it
// and write it arduino.analogWrite(9, mappedto255);
int valred1=arduino.analogRead(0);
int valgreen1=arduino.analogRead(1);
int valblue1=arduino.analogRead(2);
int valred2=arduino.analogRead(3);
int valgreen2=arduino.analogRead(4);
int valblue2=arduino.analogRead(5);
mapvalred1=int(map (valred1, 0,1023,0,255));
mapvalgreen1=int(map (valgreen1, 0,1023,0,255));
mapvalblue1=int(map (valblue1, 0,1023,0,255));
mapvalred2=int(map (valred2, 0,1023,0,255));
mapvalgreen2=int(map (valgreen2, 0,1023,0,255));
mapvalblue2=int(map (valblue2, 0,1023,0,255));
arduino.analogWrite(red1,mapvalred1);
arduino.analogWrite(green1,mapvalgreen1);
arduino.analogWrite(blue1,mapvalblue1);
arduino.analogWrite(red2,mapvalred2);
arduino.analogWrite(green2,mapvalgreen2);
arduino.analogWrite(blue2,mapvalblue2);
fill(255);
text(mapvalred1,width/4,400);
text(mapvalgreen1,width/4,420);
text(mapvalblue1,width/4,440);
text(mapvalred2,500,400);
text(mapvalgreen2,500,420);
text(mapvalblue2,500,440);
}
Exploring 555
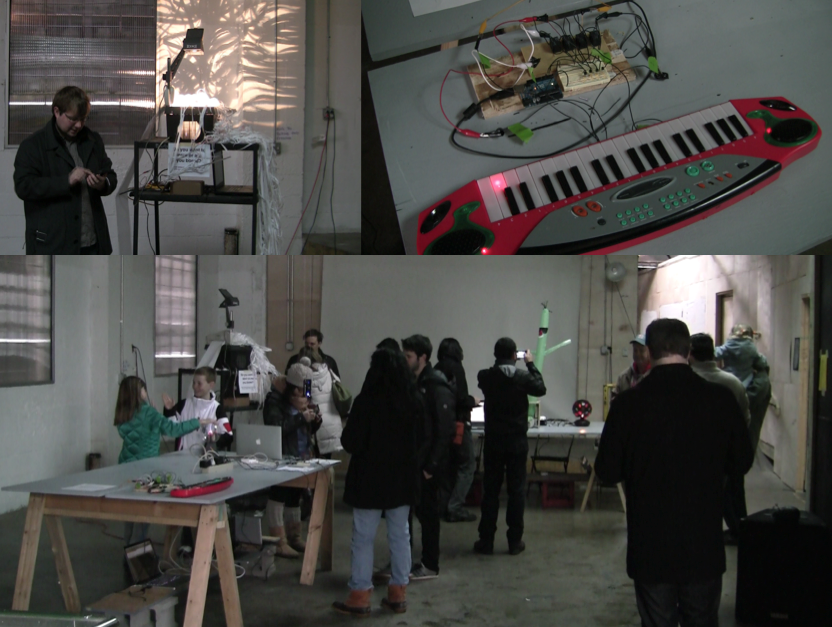
For the past couple of years, my friend and collaborator Aaron Zernack has been investigating audio synthesis using Current Voltage (CV/Gate) modular synthesizers. The whole thing has been very interesting to me aesthetically as sound, but also as to wonder about its potential in visualization. I have 2 modules now that allow me to experiment with analog synthesis in the visual realm. One is the Gieskes Oscillatoscope video synth and the other is the Minigorille Geometry Synth. Both of these devices have been an amazing ways of visualizing sound data and creating very exciting synesthesia art projects. However, I noticed that a lot of these synths use ATMega chips, same or similar to the arduinos. This made me think in a more conter-intuitive way. What if I could get rid of all the coding and produce synthesizers that modulate current voltage using simple electronics?
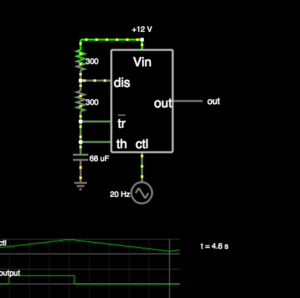
The diagram shows a snapshot of a circuit simulator of an LED fader using the 555 timer, resistors and capacitors. As you can see on the graphic we should have a smooth PWM modulation, but it ends up ramping up really fast. The video shows how the circuit is not really able to keep a consistent value, or a slow gradation of value at the least. Anyhow, This is mostly a new venue for research and experimentation. It would be really cool to simplify the circuits for my sculptures and not necessarily need to use I/0 boards for each sculpture. In this case you can see how the Red color fades in and then very suddenly it becomes white. I was hoping for a smoother transition, but nevertheless, very interesting.
RGB LED circuit
This is the circuit the right circuit to drive multiple RGB LED strips using the Arduino/wiring board. Resistor is 10Kohm and the transistor is a N-Channel MOSFET 60V 30A. Power is 12V @ 1A
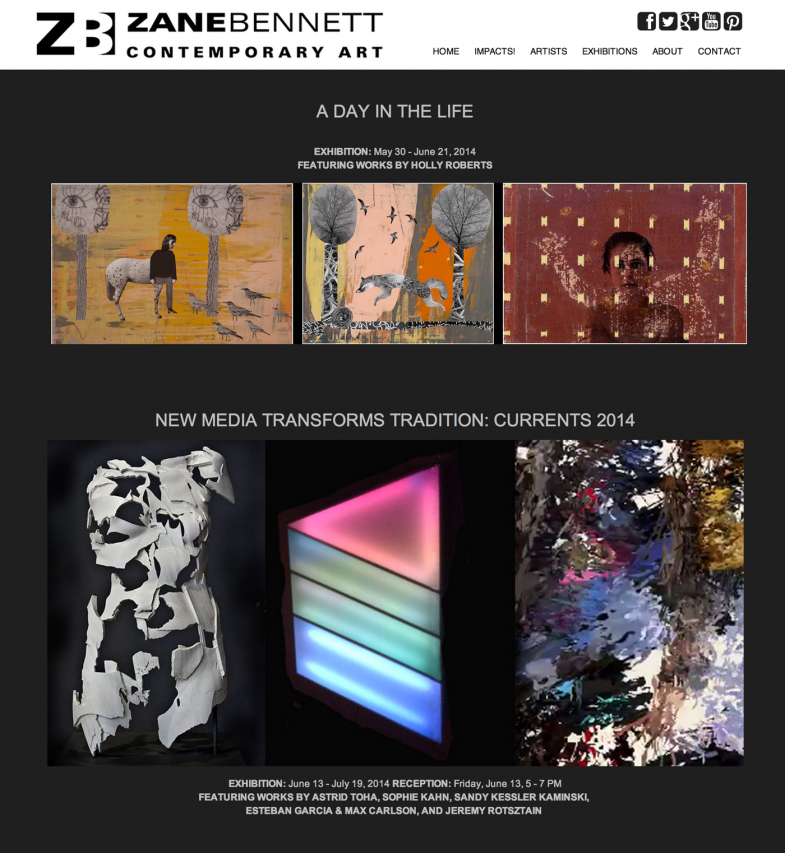
New Media Transforms Tradition at Zane Bennett Gallery
A few weeks ago my friend Max and I visited Santa Fe, New Mexico. We drove across the country with our light sculptures and lived an adventure that it will be hard to forget. Our project was presented at the gallery through the Currents new media festival, which this year celebrated its fourth installment.
A visit to Olin College
Last week a group of PPI faculty fellows, including myself, traveled from Indiana to Massachusetts to learn details about the Olin College of Engineering. Our host was Mark Somerville, who kindly shared invaluable information about his experience forging this innovative culture, pedagogy and curriculum. It was helpful to hear about the processes and struggles that Olin had in the early stages of development starting in the late 1990s and throughout. Mark was very honest with us and we were lucky enough to get feedback on our ideas for the Purdue Polytechnic Initiative. The following post is the transcription of my notes during the visit, so I hope that others might find it helpful as well. In addition to Mark, I would like to thank the groups of students and faculty that guided us during the day. The conversations were very inspiring and helpful, as we are in the development stages of a new academic experience in Indiana.
Curricular models
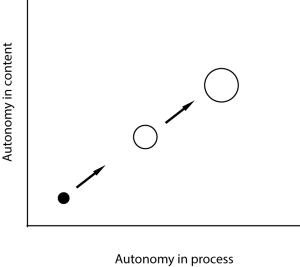
One of the things that I was most curious about was on how to achieve a balance between a flexible curriculum and specific learning outcomes. Mark explained that in the beginnings, Olin started with a very flexible curriculum, but that with time it became not as much. It was hard to implement a wide variety of courses because of practical terms (time, staff, students), so they opted for having flexibility within the courses. It was also noted that it was important to set a degree pathway for students, rather than leaving it completely open.
The above graphic illustrates the gradual increase of student autonomy in time. The dots represent project or course sequences, meaning that the first experiences would have more scaffolding and less openness. The idea is to help the student develop their autonomy in gradual process. Mark highlighted here the importance of being intentional with the first projects, because students love to be successful. Having projects with no concrete deliverables might overwhelm the student or causing that the student creates a bigger project that he/she can accomplish.
When overhauling the curriculum, Mark identified three options: a) Starting building from a list of learning objectives, b) Content-driven and c) Higher level vision + experience design. At the origins of Olin, Mark and the rest of faculty initially approached the task of creating the curriculum with a content-driven approach: What is the minimum that an engineering graduate needs?
After a post-it brainstorming, the faculty realized that in order to accomplish those “minimum” requirements, the undergraduate students would need 8 years to go through program. Subsequently, they developed the higher-level vision model.
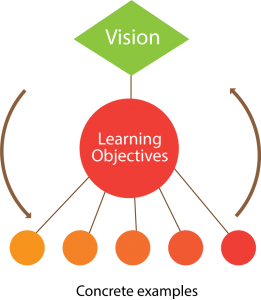
At Olin, the curriculum design is created through the Higher-level vision and experience design approach. The idea is to start asking concrete questions about the course experience, for example: Tell me the story of the third week of class. What would students be doing? How?
The above graphic shows an integrated high-level vision approach that uses concrete examples (projects) to inform the learning objectives and vice versa. The philosophy of curriculum design is more like designing an experience (like Disneyworld), instead of just starting from the learning objectives.
Below is a list of courses and projects that we learned about while we visited and serve as examples of the high level vision model in practice. The notes I have about these courses are the result of my conversations with Sharon Grimshaw, an Olin student who patiently explained to me in detail the Olin curriculum. This list and my notes are not complete, but my intention is to illustrate the type of educational experiences at Olin.
Mechanical Prototyping (aka) “Proto”
This semester, students were exploring the hand as a topic for new mechanical designs. Students explored different prototyping techniques such as 3D printing. I peaked through the window and saw several students sitting around a big table with their mechanical hands. The work was individual, but the professor was moderating a group critique of the projects.
Design Nature
Students work on 2 projects inspired by nature. One is “transporters” and the other is to design a toy for a 9 year old. The transporters is based on observing grasshoppers.
User Oriented Collaborative Design (UOCD)
This course is oriented towards identifying a design problem and teamwork. Students should stay away from technology and focus only on collaborative user experience design.
The course consists of:
- Ideation: Learn to identify problems
- Bring back to users and gather feedback
- Create visual aids and prototypes that solve the problem
The problem to solve is projected 20 years in the future, to invite students to think “outside the box.” The course takes place in a studio. Each team has their own space where they work throughout the semester.
Human Factors in Interface Design
Sharon described this course as a “sink or swim” course, combining one-half programming and one-half design. The course consists of one team project that solves an interface problem identified by the students. In team based classes, such as this and UOCD, students vote for ideas and conform groups as they wish. Additionally, they created the “silver bullet” mechanism that allows students to decide to not work with somebody in particular, such as a current boyfriend/girlfriend. The class has no lectures and it is just project based. Students identify competencies among their groups, like for example: Lead programmer or lead designer. Sharon explained: “You don’t have to learn how to program, but you can also learn if you want to.” This particular class is mainly focused on interface design for Web and Mobile apps.
Engineering for humanity
This class is co-taught by anthropology and engineering faculty. Students design projects aimed for underserved communities (elder, poor, etc.).
Physics
One lecture + Studios. Physics is taught through practical examples, projects and problems. Students focus on explaining the Why’s of observed physical phenomena, such as the speed of a basket ball. They also create theoretical simulations with MATHLAB.
Principles of Engineering
Arduino+ Design + Building systems. Combines computer code with mechanical, electrical and visual applications.
Modeling and control
Focuses on sensor and data aquisition. The course includes an experimental approach to analog sensors and filtering. Additionally to data collecting, students learn to analyze the datasets.
Digital Eye
A course on written composition and digital imaging.
Other courses: Robotics 2, Expedition atmosphere
Culture Building
Most of our visit consisted on being immersed in the Olin culture. That is the values shared by the individuals that belong to this community. It is difficult to describe how it feels to be at Olin, but it is certainly a unique place with unique cultural values. The student motivation was apparent not only on those students that gave us the tours, but everywhere we went. Students were rushing to get to the labs with not because a particular deadline, but because of a true engagement with their projects. Mark explained to us that part of the creation of the Olin culture begins in the admission process. While in a previous campus visit, students work on a one-day project. This allows them to create a bond with the community before classes actually start. It is also important to mention here that space drives behavior and the Olin campus is very inspiring. Walking through the hallways, I felt in a very creative and open-minded environment. Olin faculty created this culture by becoming truly sensitive to the student needs.
Feedback for PPI
Mark seemed very excited about the Purdue Polytech, and confirmed that we had all the right ingredients for a transformative educational experience (right people/right mindset). He addressed the fact that we have focused too much on abstract ideas and not so much on concrete examples. To me this was a wake up call to focus more on designing specific projects rather than just the learning objectives. I am very thankful to have been able to understand through the Olin example, what we need to do at Purdue. I realized that our task is not impossible!
See more pictures here
Ohio 8550 art residency
Last week I was in the middle of nowhere, in a place called 8550 Ohio (formerly known as Harold Arts). The place is near a town called Chesterhill, 20 minutes from Athens, OH. The experience was magical. A group of artists (music/visual) were nominated to participate on a residency during the month of August 2013. Jason Ajemian invited me to come and there I meet with other artists that live in the midwest, specially Chicago. There I met with the other leaders of this program: Joe Jeffers and Frank Van Duerm (both badass). They were very good hosts and made sure that we had everything we needed to make good stuff. When I asked Frank if there was any way I could help needed some help with the dishes, he said : we just want you to make awesome work. With that support in mind, I adventured to get immersed in the experience of making something brand new. The studio space is a few minutes from the lodge, the place were we slept and ate.
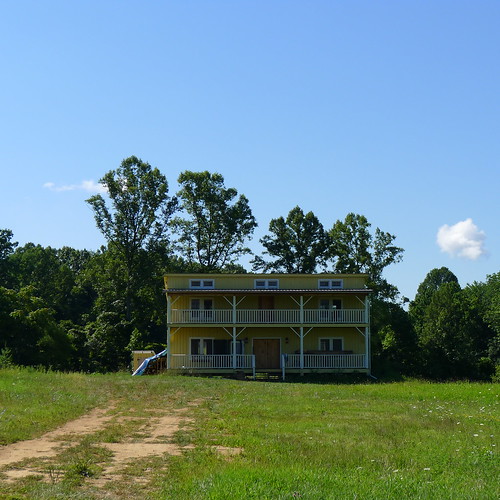
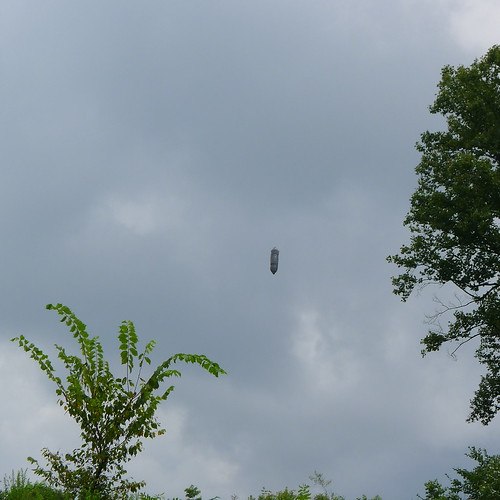
The studios are totally amazing. They were made out of wood from the farm and had 2 stories. It was great to share space with Jeff, Jessica, Ally, Dani and Molly. There were also other artists that worked on the lodge. During my time there I experimented making solar balloons. a bizarre science project that consists of making flying objects using trash bags. I have been trying to make spaceships, or flying saucers since 2010 and this occasion I succeeded in creating a working balloon.
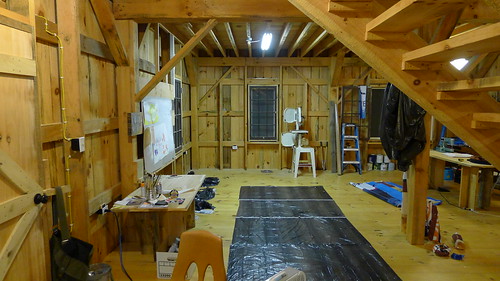
I am planning on continuing working on some more designs, but this residency gave me the space to create this large-scale experiment. In the future I hope to make some more solar balloons.
The trash bags lift because of the hot air inside it is lighter than the surrounding air. The heat is all generated by the temperature accumulated by the dark color of the bags.
The days at 8550 were wonderful. We lived in a community of like-minded artists, in a wonderful environment that had everything we needed plus a pond!
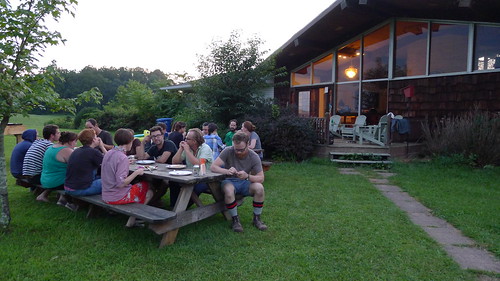
Happy artists
Exhibition in Bogotá
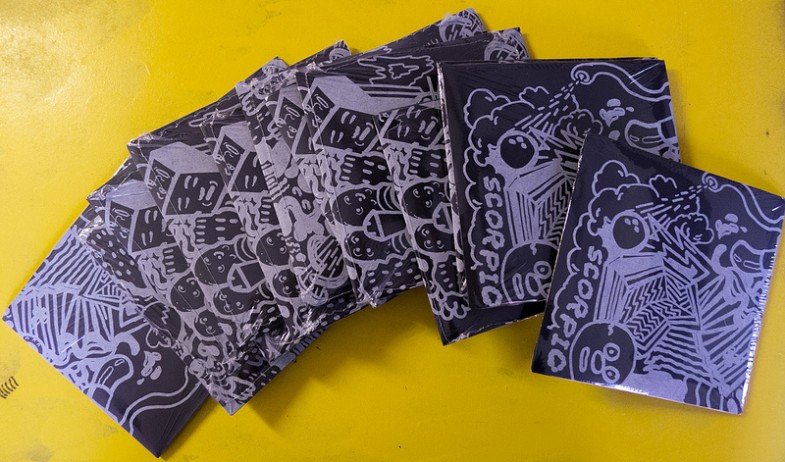
My friends from espacio 101/ La ramona proyectos organized an independent publication festival called C-Zine. The exhibit took place in El Parqueadero-Espacio de proyectos Museo de Arte del Banco de la República, in Bogotá Colombia. For this invitational, I asked my buddy Aaron Nemec to finalize one of our drawing projects that we had been working since 2010. The results of tracing each other’s drawings became image sequences and animations. The inspiration for the each sequence was almost surreal… Our conversations of the day, could turn into actual sequences- like in the case of the Knife-donut-hulk sequence, taken from a discussion about cutting donuts at home. The result was “Scorpio” a 3 minute animated short with hundreds of drawings in motion. The soundtrack was developed by Nemec and I, but mostly Nemec. The editing process was pretty cool. I feel like we were swaping files for a while and building it very slowly.
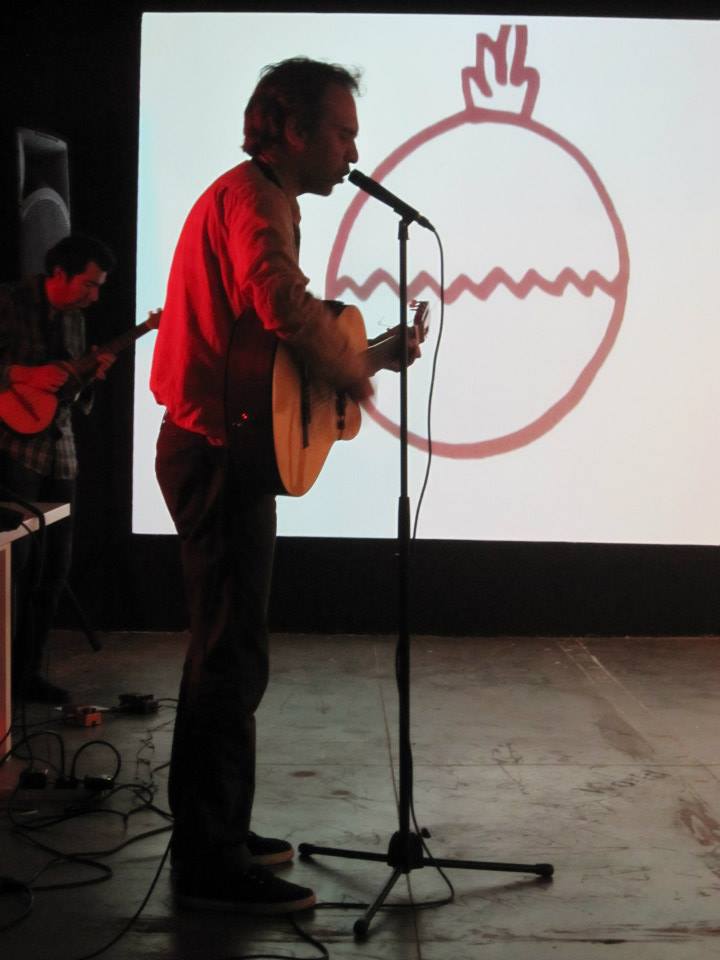
Las Malas Amistades performing
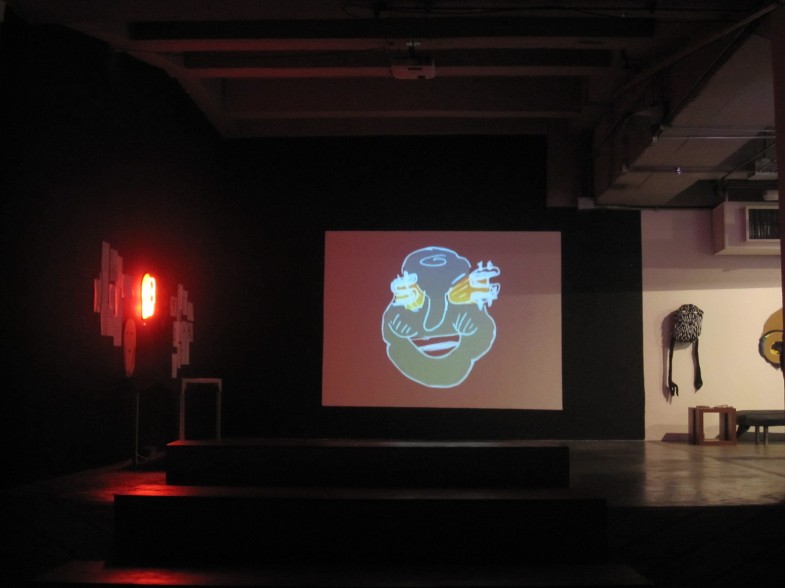
Scorpio in the Exhibit
C-Zine view (pictures by La Ramona)
Another part of the process with Scorpio, was to create it into an actual DVD to be more of a publication. For this matter, buddy Zern from Mine-Us print hooked us up with some pretty awesome inks. We used the limited edition prints to wrap the disc…
This was a very exciting experience of bridging Bogotá (my hometown) and Lafayette (where I’ve lived for 8 years). La Ramona and Foamcity will continue developing more cross-national exhibits in this two places this fall. After “Pizza” in 2012, we are planning a new show called GIF: graphic interchange format. Stay tuned!
ISEA 2013
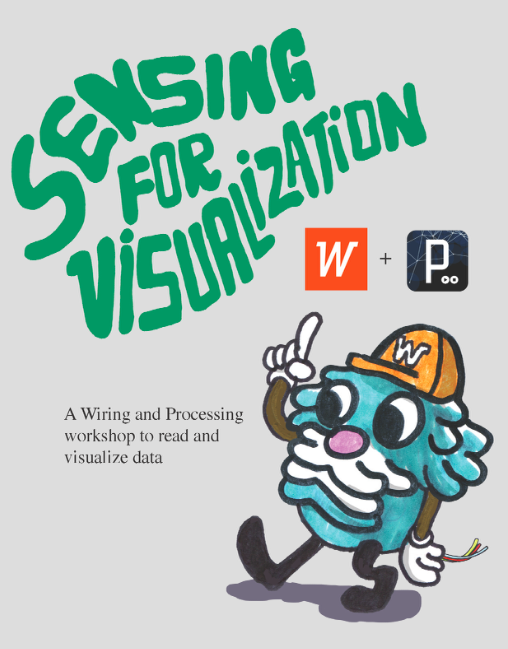
I arrived to Sydney a few days ago for the ISEA. Before the conference starts on Tuesday, the event has a series of workshops with an electronic arts focus. I gave my workshop “Sensing for Visualization” yesterday and will repeat it today at 3 PM. The idea was to create a programming crash-course for physical computing. The workshop covered Processing and the Wiring board. It was cool to put the idea to a test with participants. The workshops occur at the College of Fine Arts of UNSW.
You can download the file with the workshop here
I was interested on teaching the Wiring board in the context of the Latin American Forum of the ISEA and to give information about this seminal project that preceded Arduino developed by the Colombian artist/designer Hernando Barragán. Hernando was a professor while I did my art undergrad in Bogotá at Universidad de los Andes, were he still teaches.
There are a lot cool things going on. Right now I at a workshop named SurSouth, an online collaborative conversation. It was great to reconnect with an old friend, Hamilton who now lives in London. His work is pretty cool. His objects are living organisms that exist through alchemy and technology. Check his stuff here
There we be a lot coming up. I’ll try to document other experiences of this trip. There is too much going on.
Interactive light show
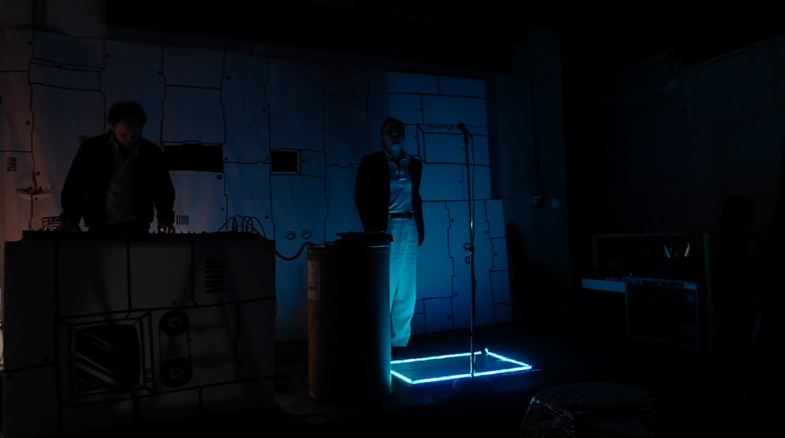
I have been involved with the band Tigerfox since their very beginnings as a sort of an art director for their live performances. Last year I did some video projections of computer programs with interactive graphics. For the their new music, my friend Ryan Puetz had this grandiose vision of adding lights to their show. I was excited to create some kind of “interactive light carpet” that I could control in the background, changing colors and rhythmic patterns. I used arduino and processing to make this. If you want to see a video of the performance/music, check here
Arka-android
Ever since I went to the processing.android symposium led by Daniel Sauter at UIC, I wanted to have an android. It is fairly easy to develop applications for android mobiles using the language processing. You can find very complete documentation on the how-to’s here: http://wiki.processing.org/w/Android. You can also have access to the hardware components of the android device using the Ketai library, developed by Sauter and Jesus Duran.
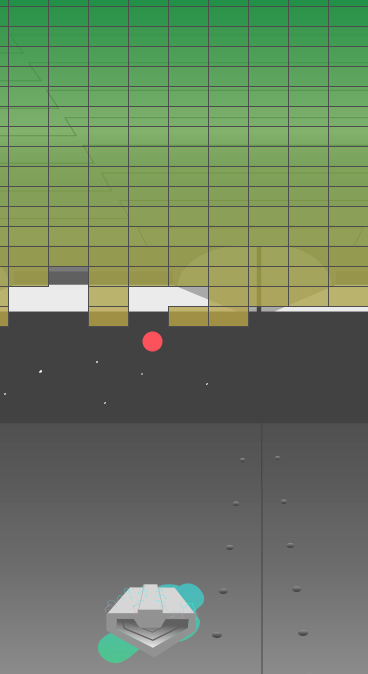
I incorporated my paintings as sprites for the popular game “Arkanoid.” My idea was to make a painting into something more than painting. A playable painting?
Networked Objects

Last January, I invited Camilo Martinez and Gabriel visited to visit the Lafayette area to develop an art workshop and residency with Purdue students and the lafayette community. It was a great experience to have this artists lead an arduino-based workshop aimed for the Physical Computing students from Purdue’s electronic and time based media artists.
During the workshop, Gabriel and Camilo taught us how to interface home appliances to email and twitter. The results were displayed in a one day exhibit at foamcity.
Workshop and Paper in ISEA 2013
My workshop “sensing for visualization” and paper “Stretch” were selected for the next ISEA 2013 in Sydney. Good news to start the year. The workshop introduces the use of analog sensors to produce interactive experiences. Using inexpensive microcontrollers, components and open software, participants will prototype electronic boards to read meaningful data from the environment. The sensors can be affected by the light, the orientation, or a user’s physical input. I’ll be using the Wiring microcontroller.
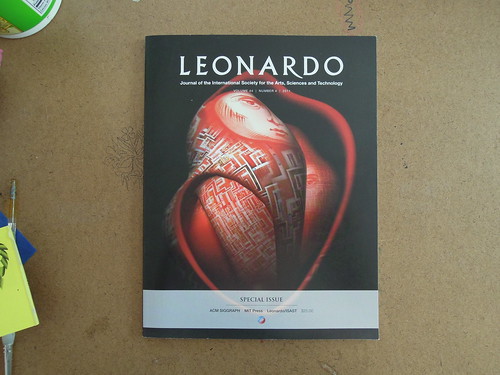
Stretch: An early software art framework by Aldo Giorgini
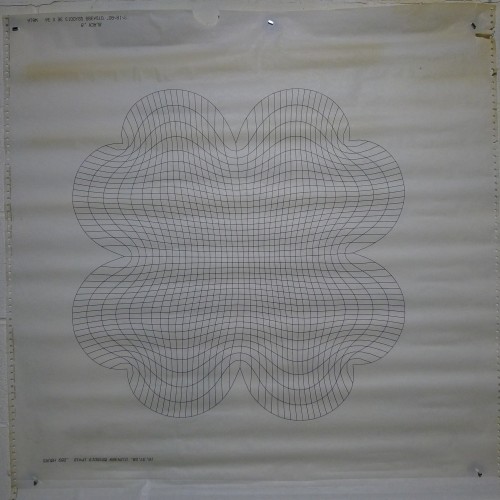
Stretch provided Aldo Giorgini (1934-1994) with a framework for manipulating vector primitives using his own mathematical model. Although stretch was technical report in 1981, Giorgini had a prior body of work in 1976 that demonstrated the use of stretching algorithms to make art, like in the case of inedited works such as checkerboards, stripes, polka dots and swiss cheese. After exhaustive primary source research at Giorgini’s estate in Lafayette, Indiana, there was no evidence that the manuscript for Stretch was actually published. However, the Stretch framework was found in a manuscript stage and this paper will unveil the methods that Giorgini created for his own artistic production. The program was written in Fortran IV and intended for a CDC-6600 computer.
Arkanoid clone
This is the code for an arkanoid clone based on local-guru‘s. I decided to use it to explain how to bring vector graphics from illustrator into a game framework in processing using the Pshape object. I have commented as much as possible the original code to allow for an easy implementation.
/**

 * a arkanoid clone by

 http://www.local-guru.net

 * use the mouse to play
slightly modyfied by snebtor.org
Replacing graphic elements with pshape
*/
int px, py;
int vx, vy;
PShape ship;
PImage back;
boolean paused = true;
boolean done = true;
int[][] stones;
void setup() {
//noCursor();
size(1280,720);
ship = loadShape("ship3.svg");// vector loader
back=loadImage("bg.png");//raster loader
smooth();
px = width/2; //position of ball x
py = height-70;//initial position of ball y
vx = int(random( -25, 25 ));//initial speed
vy = -40;
stones = new int[31][17]; //two dimesnional array of stones
for( int x = 0; x < 31; x++) {
for( int y = 0; y < 17; y++ ) {
stones[x][y] = y + 1;
}
}
textFont( loadFont( "font.vlw" ));
}
void draw() {
//shape(bg,0,0);// needs to be a simple image in this case we rasterize
background(back);
stroke(60);
strokeWeight(1);
noCursor();
// update postion of the ball
if (!paused) update();
// draw all stones that are not removed yet
// check if all are gone
done = true;
for( int x = 0; x < 31; x++) {
for( int y = 0; y < 17; y++ ) { //create new rows or columns of elements
if ( stones[x][y] > 0 ) {
done = false;
fill( 1 + 10 * stones[x][y],145,52,200 );//this is an array for the gradient fill
rect( 10 + x * 40, 10 + y * 20, 40, 20 ); //this is the stone design
}
}
}
// no stone remaining - display yippie message
if ( done ) {
paused = true;
fill(255);
textSize( 48 );
text( "JIPPIE!", 50, 200 );
}
// display text if paused
if ( paused ) {
textSize( 16 );
fill(128);
text( "press mousebutton to continue", 10, 650 );
}
//draw starts here
// draw paddle
shape( ship, mouseX+106, height-280, ship.width/3, ship.height/3 ); // here we locate the new vector file considering width of graphic
fill(mouseX,56,70);
noStroke();
// draw ball
ellipse(px,py,20,20);
}
void update() {
// check if ball dropped out of the lower border
if ( py + vy > height - 10 ) {
px = width/2;
py = height-70; // make the distances relative to size of the screen
vx = int(random( -40, 40 )); //change speed here too
vy = -19;
paused = true;
}
// check if the ball hits a block
for( int x = 0; x < 31; x++) {
for( int y = 0; y < 17; y++ ) {
if ( stones[x][y] > 0 ) {
if ( px + vx + 10 > 10 + x * 40 && px + vx - 10 < 10 + x * 40 + 40 &&
py + vy + 10 > 10 + y * 20 && py + vy - 10 < 10 + y * 20 + 20 ) {
stones[x][y] = 0;
// change the velocity in y direction if the block has been hit
// on the bottom or on the top
if ( px + 10 > 10 + x * 40 && px - 10 < 10 + x * 40 + 40 ) vy = -vy;
// change the velocity in the x direction if the block has been hit on the side
if ( py + 10 > 10 + y * 20 && py - 10 < 10 + y * 20 + 20 ) vx = -vx;
}
}
}
}
// change the direction if the ball hits a wall
if (px + vx < 10 || px + vx > width - 10) {
vx = -vx;
}
if (py + vy < 10 || py + vy > height - 10) {
vy = -vy;
}
// check if the paddle was hit
// change the place where you want the ball to be matched with mouseX
// take into consideration the height of your vector file
if ( py + vy >= height-80 && px >= mouseX - 53 && px <= mouseX +53 ) { //change these values to map boundaries of ship, need to know size of ship
vy = -vy;
vx = int(map( px - mouseX, -33, 33, -18, 18 ));
}
// calculate new postion
px += vx;
py += vy;
}
void mousePressed() {
paused = !paused;
if (done) {
for( int x = 0; x < 31; x++) {
for( int y = 0; y < 17; y++ ) {
stones[x][y] = y + 1;
}
}
done = false;
px = width/2;
py = height/2;
vx = int(random( -40, 40 ));
vy = -18;
}
}
Giorgini’s software art frameworks
A small version of ‘Light B’ (1977)
Among the 78 different Civil Engineering reports found in Giorgini’s Vitae from 1990, a small group of software art projects were listed. The majority of publications found displayed texts, mathematical foundations, computer codes and illustrations for the visualization of Hydraulic models. In a lesser proportion, the reports that featured software art were: Light, Palette, Photo, Drawing, Fields and Stretch. These programs were created as frameworks for artistic production. Giorgini had the aim to make his ideas approachable to future artists and researchers, keeping notes, graphics and extensive documentation about these programs. The only technical report for software art I have found is the “Fields” one (1974), however, the others were found in the form of manuscripts at Giorgini’s estate. The Potter Engineering Library at Purdue, that currently archives Purdue’s Civil Engineering materials from this time has no record of these reports either. Based on this evidence it is possible that the documents listed as published in the Vitae were never published or at least missing . In the 1984’s Vitae, Stretch, Palette and Photo are listed as “in print.”
LIGHT 1977
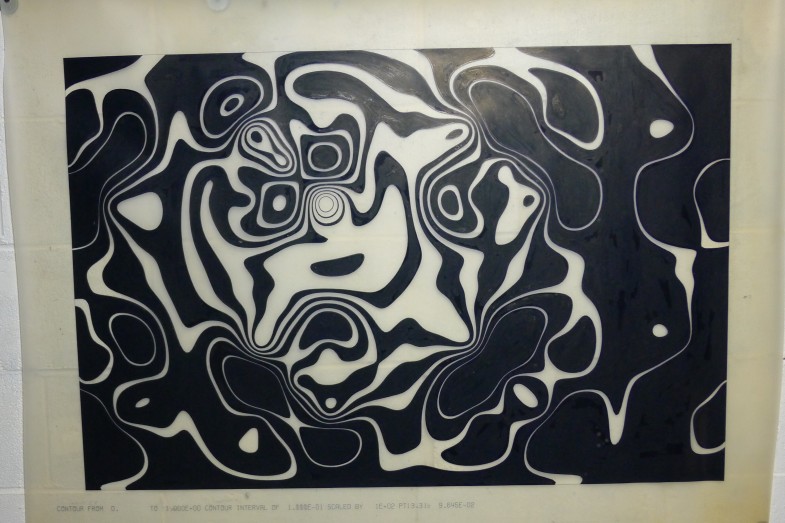
I found no records of the program “Light” from 1977, the one used to produce the Murals commissioned by the Aesthetics in Technology program to decorate the Potter Engineering Center. The only documentation of Light A and Light B (alternatively titled “Fiat Lux” and “Sculptural Forms”), is the extensive trails of the process of creating gigantic photographic image reproductions on mylar, and later transferred into photographic paper using the photogram technique.
Radio Chigüiro in ISEA 2012 Albuquerque

Yesterday I received the ISEA proceedings. Below is a link to the article:
Presentations at ISEA 2012
In september I had two presentations in LAF ISEA 2012 in Albuquerque, NM. It was really great to see this part of the country and reconnect with my friend Andres Burbano, whom invited me to collaborate in the code talkers panel. I have decided to add here both of my presentations in pdf for documentation
Radio Chigüiro was a social platform for the distribution of Lafayette, Indiana’s “glocal” culture. It operated as a community radio, exploring youth practices associated with parties, live music shows, and free radio workshops by using a web site as a medium for contact, production and participation. Using basic computers, participants will learn to produce their own radio programs. The objective of the workshop is to instruct in easy
and free resources for audio recording, editing and broadcasting.
The workshop is available here:
and materials here:
My other presentation was “Navajo Code Talkers and technology.” I was invited to collaborate with this project, originally conceptualized by Andrés Burbano.
The Latin American Forum at ISEA2012 is proud to host Bill Toledo, Navajo Code Talker. The history of Native American Code Talkers remains as one of the most complex and intriguing interactions between indigenous communities and the geopolitical challenges that characterized the XX century. This conversation with Bill Toledo is not only an opportunity to engage with his personal history and the context of his work as a code talker, but is also an opportunity to explore topics related to the nature of language, code and computation. This presentation highlights the renovation of the discourse about Latin American understanding with the richness of the Native American Cultures.
Presentation here:
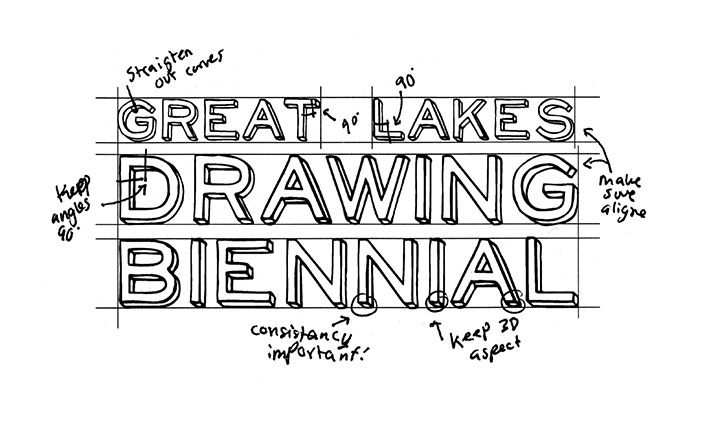
Great Lakes Drawing Biennial
Last week was the opening of the 2012 Great Lakes Drawing Biennial. My friend Brian was curating this exhibit and I came to visit him and the show in Eastern Michigan University, Ypsilanti. I got to check out their great art buildings and meet some of the faculty. My work shapey 48 was displayed in the Ford gallery along with other really exciting visual art. I am glad to come back to the Detroit area… it has a vibrant scene in the arts.
Iosafe NAS animation project
My friend Chad interviewed and edited this promo about my animation work for Iosafe NAS-cloud computing.
CGT 211-Raster Imaging for Computer Graphics
Art by Rachel Whitson
Course overview
Digital images are produced using a variety of computer technologies. Advanced color theory, surface rendering, and light control are emphasized in relation to technical illustration, hardware characteristics, and software capabilities.
Course objectives
Upon completion of this class, students will be able to:
- Demonstrate understanding of the primary attributes and differences between vector and raster graphics and their application to various communicative products and tasks.
- Demonstrate understanding of analog and digital data forms and the conversion processes relating to digital imaging.
- Appropriately use common imaging application features such as layers, channels, paths, filters, color adjustment and correction tools, histograms, color mode tools, and calibration tools.
- Demonstrate understanding of input, manipulation, and output technologies related to raster graphics.
- Demonstrate understanding of color theory, color models, color systems, and the psychological affects of color in raster imaging.
- Demonstrate understanding of miscellaneous raster graphics issues such as file formats, compression technologies, vector to raster conversion methods and the legal implications of copyrights, trademarks, licenses, and releases.
- Demonstrate skill and proficiency in creating professional raster graphics for all types of output including: textures for use in 3D environments, photographic reproduction, digital illustration, web delivery, CD-ROM multimedia, and self-promotion.
A&D 101 – Electronic Media Studio
The Electronic Media Studio 1 is an art studio before it is a computer course. Our goal is to make art with computers, not simply learn how to use computers. Every student in this course should use it as an opportunity to become a media art creator rather than consumer. Assignments in this course are invitations to invent and experiment. They are also designed as hands-on experiences to explore the possibilities and pitfalls of this new medium.
CGT 112 – Sketching for Visualization and Communication
Art by Priya Johal
This course applies fundamental computer graphics concepts of visualization, communication and creativity within a sketching metaphor. Exercises and projects in graphic theory, problem solving and sketching skill development provides students with activities that focus on further development within the discipline. A variety of sketching techniques are used to gather critical information and transform data into effective communication instruments.
Course Objectives
- Demonstrate the knowledge, technical skills and personal discipline required to be successful utilizing sketching abilities for creative problem solving in a technical environment.
- Demonstrate the knowledge, technical skills and personal discipline required to be successful utilizing visualization abilities for creative problem solving in a technical environment.
- Systematically identify, evaluate and solve problems using points, lines, surfaces, and solid geometric forms in the solution of technical problems.
- To develop an understanding, and be able to use, common geometric construction techniques when creating 2D and 3D geometric forms for the solution of technical problems.
- Acknowledge the history, research, and implications of sketching methods for creative problem solving in a technical environment.
- To develop skill and proficiency in the ability to present clearly identified solutions using freehand sketching graphical communication conventions and standards in a technical environment.
- Develop sketching skills for communicating ideas.
- Read and interpret visual content.
- Understand the basic concepts of visual communication.
- Utilize sketching methods to represent organic and inorganic shapes.
- Utilize sketching methods to represent and communicate creative ideas.
CGT 216 – Vector Imaging for Computer Graphics
Art by Ben Yoder
Course overview
Full-color vector illustrations for a variety of uses are produced using computer methods. Color theory, surface analysis, and rendering techniques are emphasized as they apply to vector-based technical illustrations .
Course objectives
Upon completion of this class, students will be able to:
- Understand the cognitive and communicative attributes that make graphics effective.
- Learn about the history, implications and application of vector graphics.
- Specify color in RGB, HLS, CYMK, and PANTONE systems as they relate to vector illustrations.
- Discover the suitability of PostScript vector graphics applications for particular illustration tasks.
- Gain skill in an industry-standard PostScript illustration tool.
- Describe methods for planning and evaluating informational graphics.
- Develop experience in securing high-quality color output from service bureaus.
- Learn about the principles of light, shade and shadow as they apply to vector renderings.
- Create realistic and appealing technical graphics for visualization.


